Database Management
1. Log into my.cloudwafer.com account.
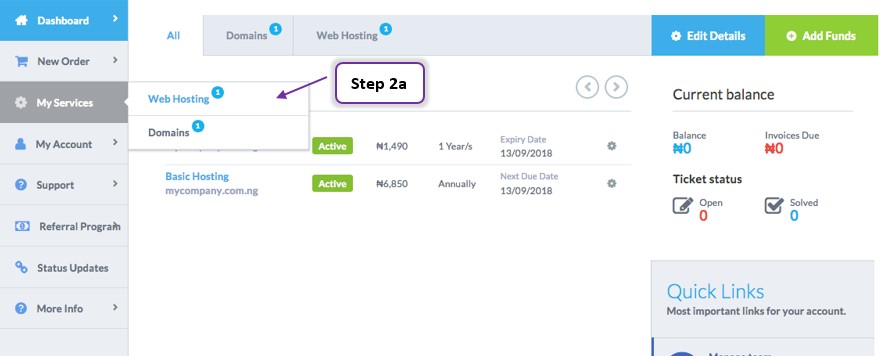
2. Navigate to My services Option, Click on “Web Hosting”. Then this will show up.


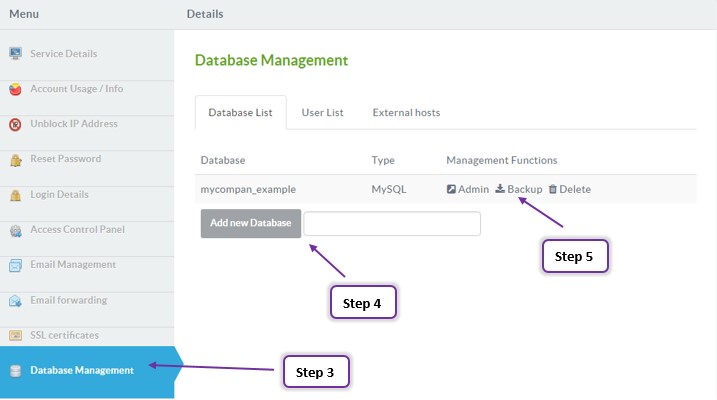
3. Now click on the domain name, And choose “Database Management” on the Menu.
NB. If you manage more than one domain, choose the appropriate domain from the menu.
4. Enter your Database name and click “Add new Database”
5. Once you add new database it will show up on the database list.

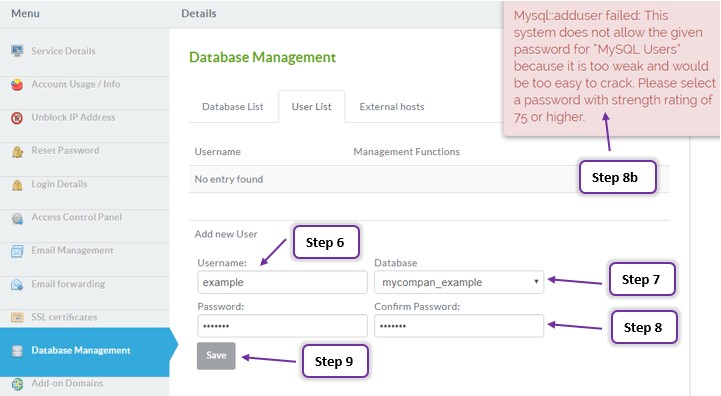
6. In the “User list” tab, enter the username that you wish to create for
7. Enter the database name which you want to create user for
8. Enter your new password and make sure your password is strong
9. then click on the “Save” button

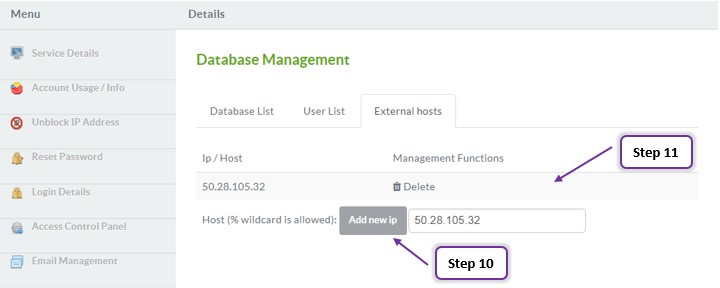
10. In the “External Hosts” tab, enter your IP address and then click on the “Add new IP” button.
11. It will show up like this once you add new IP address.
